
Primary Bathroom Plans
Saying goodbye to the old bathroom
And good riddance! We had CARPET in the primary bathroom. A maroon corner tub. Mirrors on almost every surface in the bathroom including the plugs and light switches. I don’t want to make any assumptions… but the first owners must have been really… adventurous. I have other adjectives I can use to describe them, but I shall refrain.
But before I do a deep dive on our design choices let’s take revisit and see what it looks like in its current state.

I mean, I gotta say, it is a comfy tub but I am not about to bathe in it- I don’t even know how to clean the jets of this thing. But the steps up are a hazard and underneath it was the aforementioned carpet.
How they managed to tile OVER carpet? I don’t want to know. But if I had to hazard a guess, they framed the steps without ripping out the old carpet and then tiled over it. Just lovely.

Let’s not forget the tinyyyy dark shower stall they allotted themselves in a very generous size bathroom. Or the one sink vanity that is the perfect height for children but certainly back breaking for anyone over 3 feet tall. By the way, two sinks would have fit quite nicely here.

And of course a shout out for the mirror inception that happens in here every time I walk in. One should never have to see yourself from different profiles when using the toilet is all I’m going to say. I’m a confident woman, but dang if all these angles walking out of the shower trip me out!
So what now?
As I type these very words, my wonderful contractors are demoing this very bathroom. K and I are not handy people. Mostly because I am very bad at math and he’s not one to learn power tools. So we hired our trusted team that we’ve worked with in our past three homes. (And I always ask if I can share their contact but they always politely decline.)
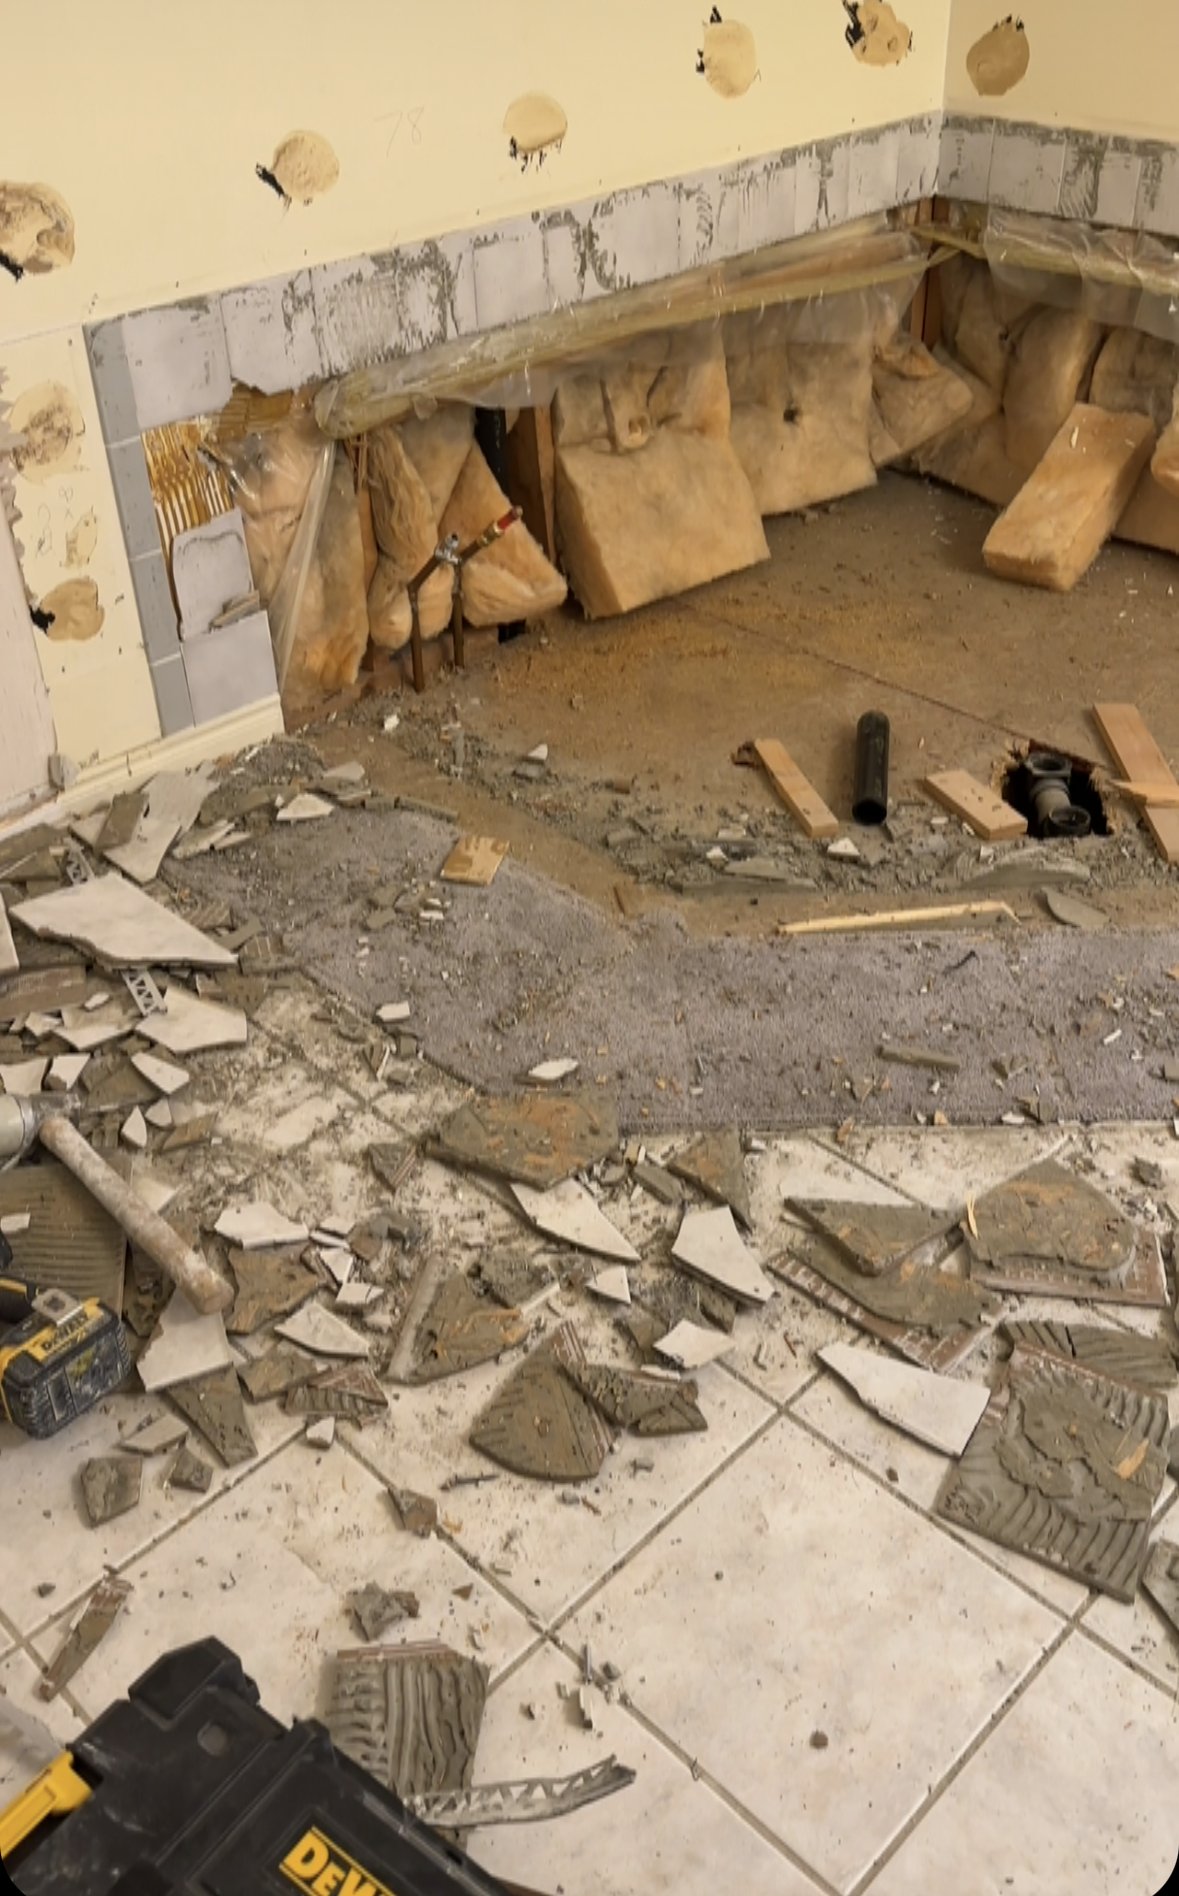
Do you spot the carpet around where the tub use to be?!
What are the design plans?
Before we delve into my scheming, I just want to say that everything is subject to change because I’m not a designer and just pick and choose things at the seat of my pants. As much as I’d love to bring this to life, things like budget, logistics and timelines we have to consider. But if all goes according to plan, this is the direction we are heading in!
Ok now on to the fun stuff!
We are going to put in a double sink vanity where there is just one right now. I love that it has a marble counter top and the lines of this vanity. The colour we ordered is currently out of stock but keep an eye on it! They restock quite face.
We also plan to take down all the mirrors surrounding the entire bathroom and just do two of these oval mirrors.
It’s going to look so elegant with brass sconces flanking them on either side. I linked more options here.
But the shining star has got to be this dreamy wallpaper. It’s a bit of a splurge so you might want to consider this option or this one for a similar look.

I love how the oval mirrors juxtapose the straight lines of the vanity. And I’m mixing brass sconces with polished nickel faucets with cross knobs.
For the bathtub area, we are making our dreams come true with a clawfoot tub. I’m linking a similar one here. I wanted to make a statement with a chandelier above it and of course I put my dream Jacqueline chandelier on my mood board. Here are some similar looks for less.
I made sure to repeat some brass and polished nickel elements on this side of the bathroom as well with the tiered towel rack.

I’ve been antiquing and have collected a few frames to create a gallery wall here with dark wood tones like the vanity. This gallery wall was inspired by @cohesivelycurated on Instagram who did something similar above a freestanding tub.
PS: We did order honed subway tiles for the walls around the permitter of the room and we also have trim going around for a pretty detail.

Last but not least the shower stall, it’s simple and understated. I’m using a similar Edwardian style shower kit in polished nickel in here. I’ll link something similar here.
We did get honed marble subway tiles for the shower stall as well which we will make sure to seal before grout and after grout. We’ve had shower bathroom stalls before and we sealed it every six months and it held up well for the three years we lived in our previous house.

Photography: Janet Kwan, Design: theKwendyHome, Wendy Lau
For the shower floors I went with this pretty mosaic that reminded me of the floor design we chose for our foyer and laundry room/mudroom which ties nicely with the rest of the house!

Photographer and designer: Katie-Rose and Rob Decoeli
For additional storage, I feel in love with the idea of a hutch like this by Katie-Rose and Rob Decoeli. They detailed their up-cycled project here and I am so inspired by it!
I hope to create a similar vibe with the antique piece I found with Christine @forthehome on our recent visit to Cleveland, Ohio!

And here is the entire mood board all together! Shop the look here. This will be the direction we are heading in and I love it so much!
But to add a little dose of reality, the wallpaper and chandelier is definitely a splurge so we may tweak this as we go. Wish me luck!
Thanks for reading! I hope you like the mood board just as much as we do! And a special thank you if you choose to support us by shopping through our affiliate links in this blog post! It helps keep the blog running!
Love,
W