

Kitchen Reveal & Kitchen Budget Breakdown
As I type this, my kitchen is 95% complete! I'm just missing some air vents and a few trailing plants
(I want it to look super lush! Imagine if I got a LEMON TREE! OMGOSH!) Ok, back to the blog. Here are the most frequently asked questions about our kitchen down to the nitty gritty details. I linked everything I can and for ease of reading, I have broken down this blog post into sections. You'll find a section on Layout, Moodboard, Cabinets, Counters, Appliances etc.
Shoutout to Janet Kwan who took all the pretty after photos! I've been working with her for over three years now and she makes my home look magical.
And can I just say that I must really love you guys because writing this blog post gave me some serious heart palpitations like nothing else. I share the cost of everything and tallying it up made me light headed LOL! But this is all in the spirit of sharing resources and a desire to give you a realistic expectation for timelines and budget when jumping into projects like these.
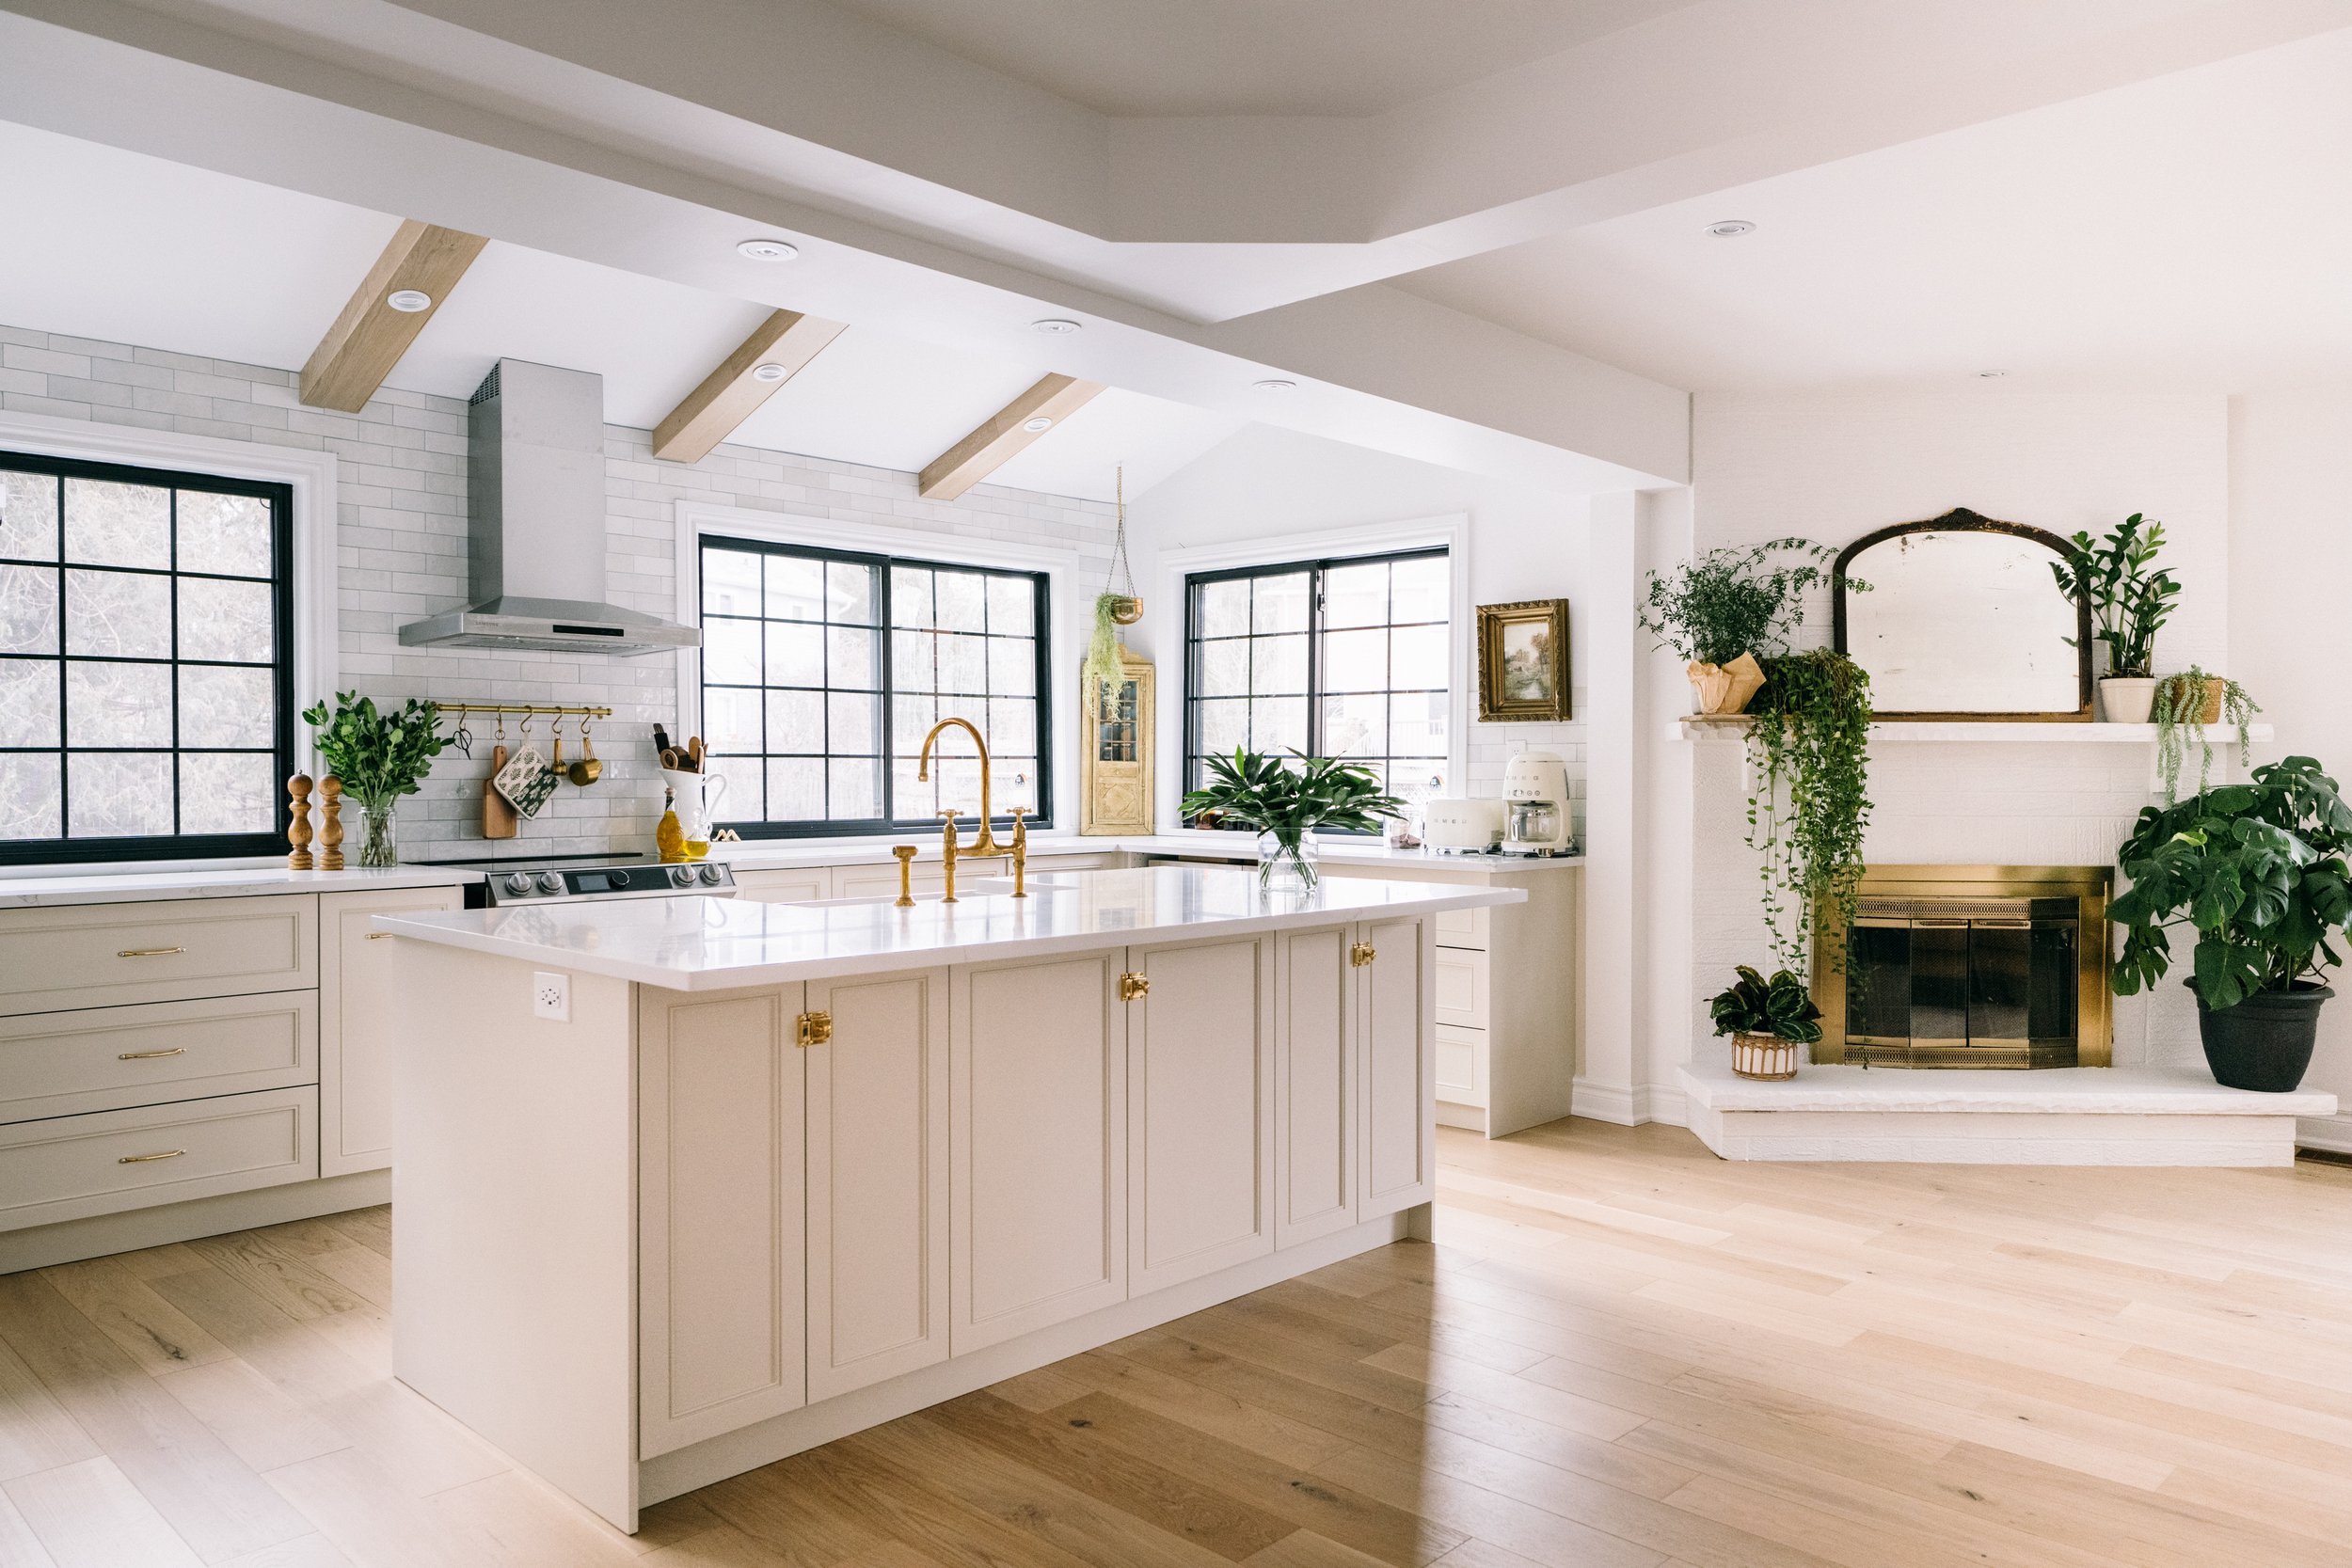
So let's talk about how we went from this, to this! It took us nine months from purchasing the house to the completed space you see right now. It's like giving birth LOL.
LAYOUT
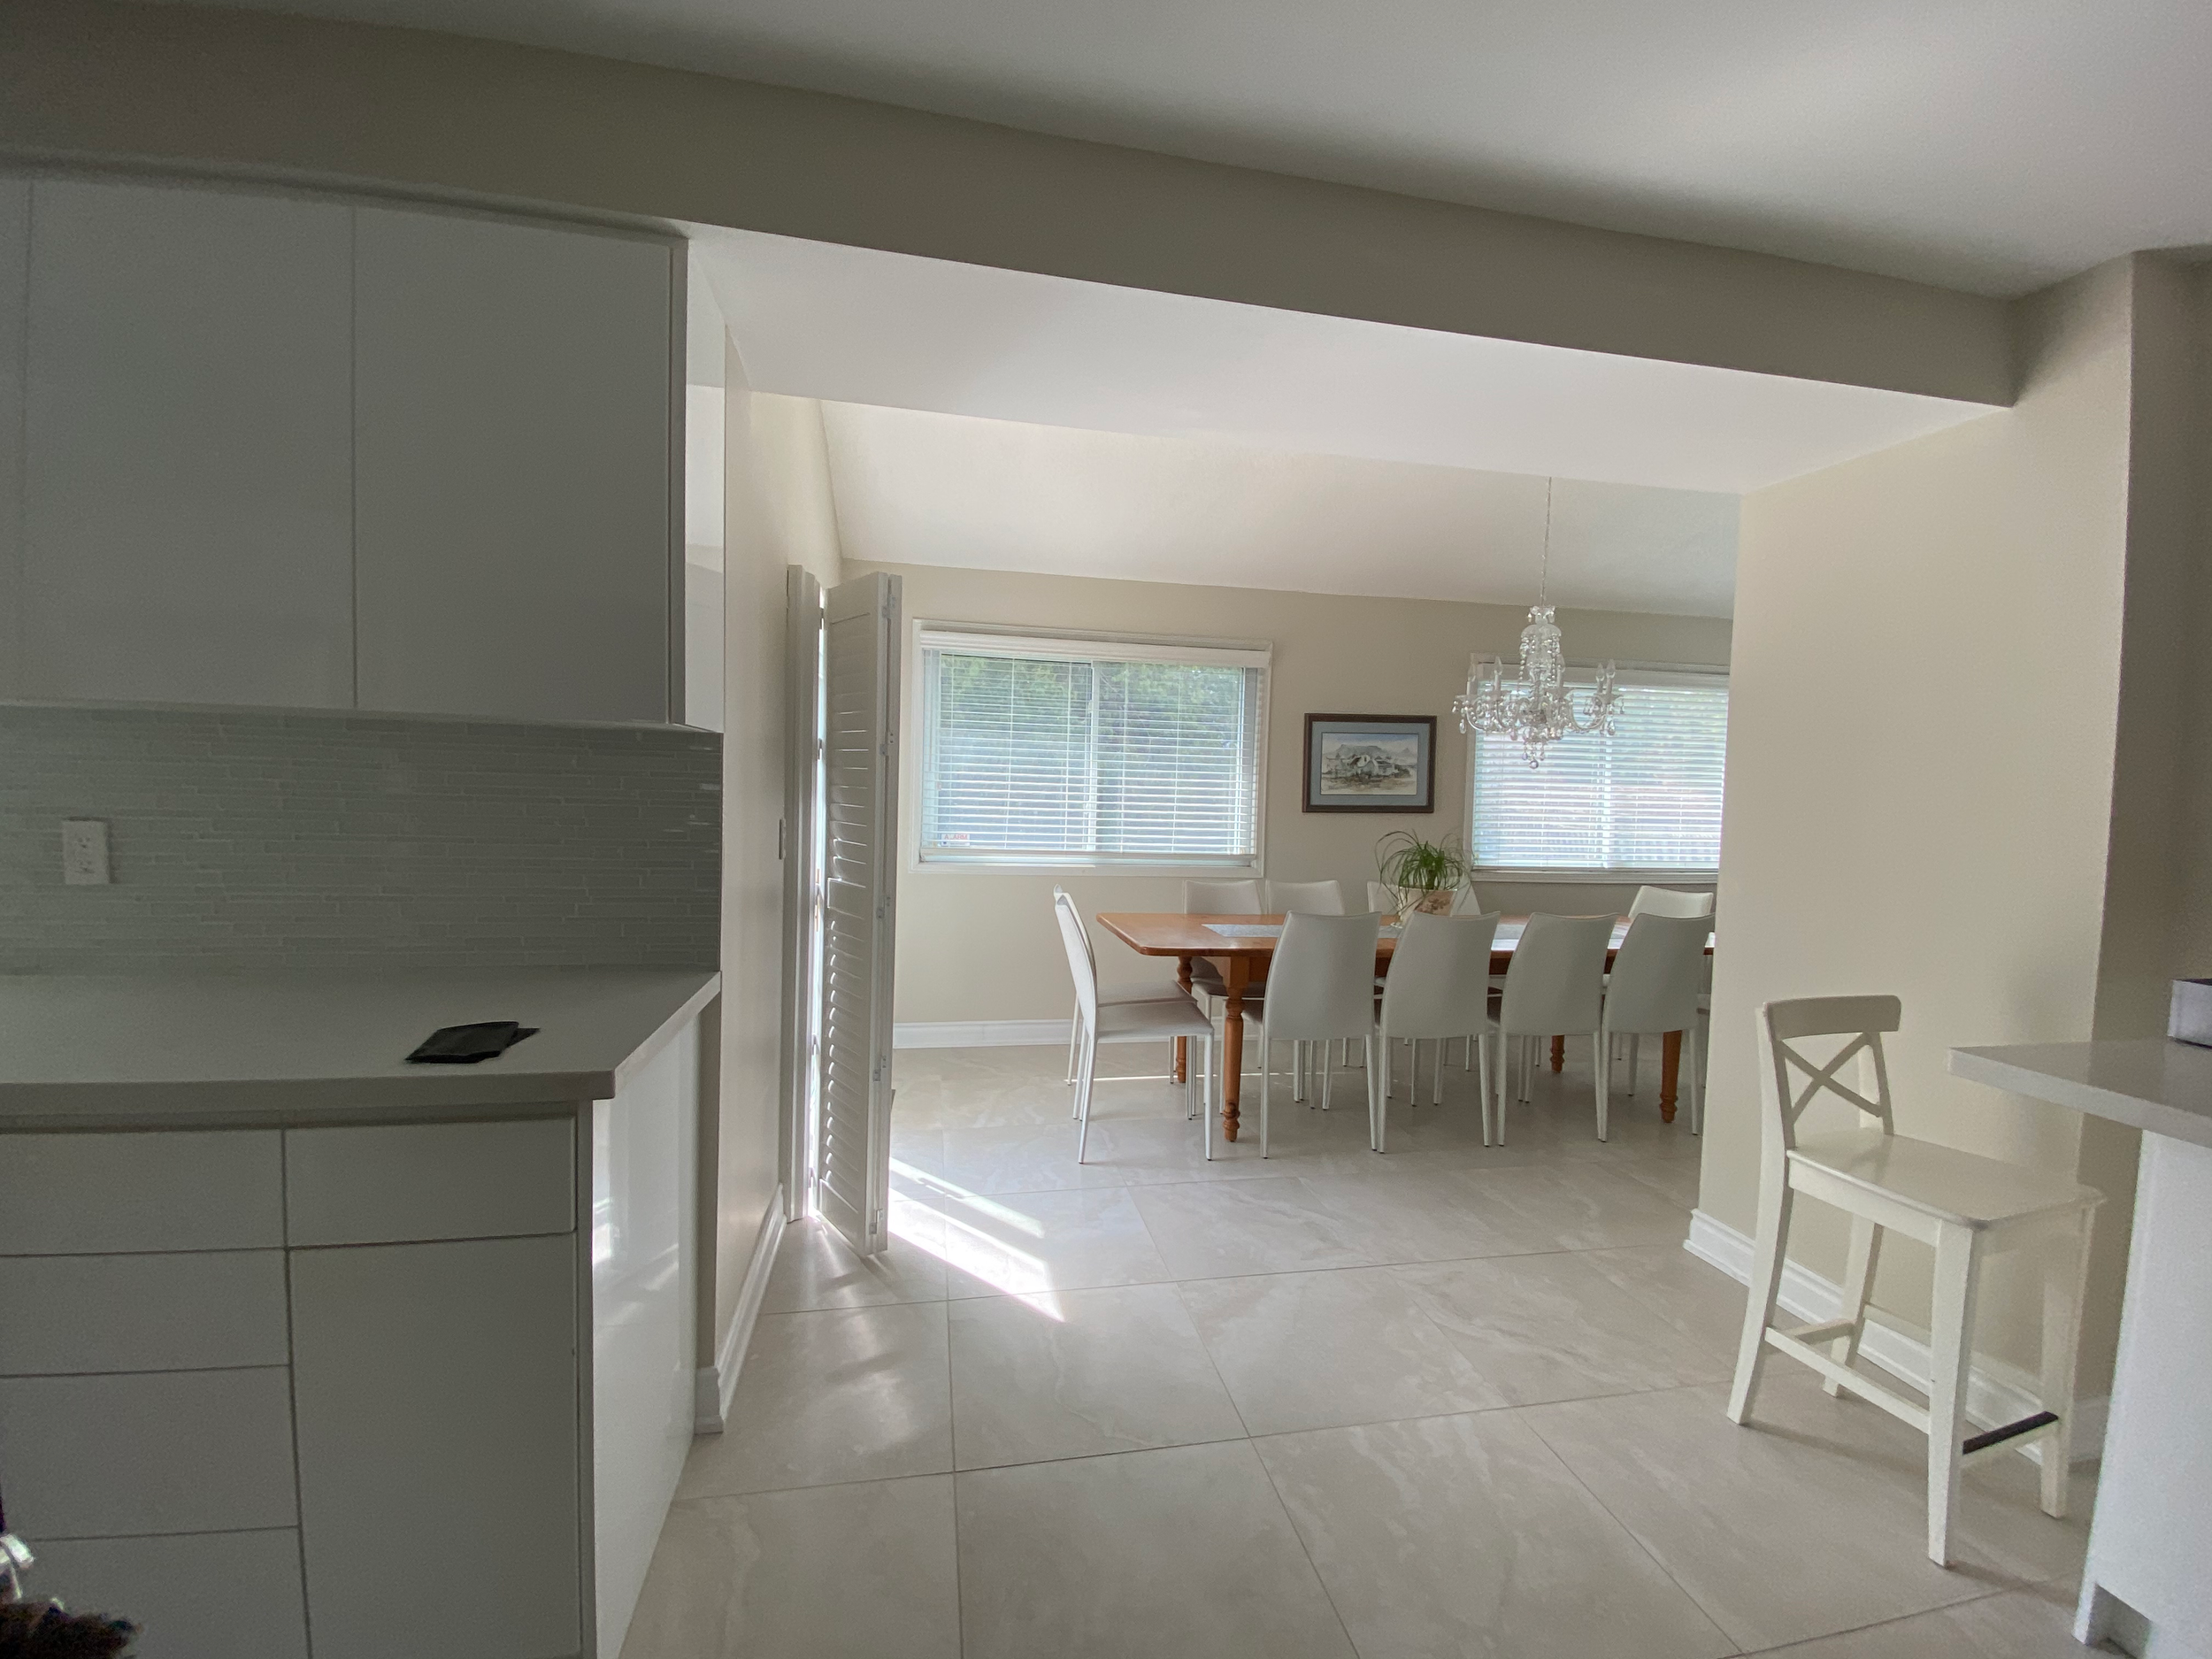
Let's start with the layout first. We first looked at this house and realized that we needed to relocate the kitchen. The existing kitchen was very small and oddly arranged. They had two floating cabinets awkwardly placed against two walls and made the entrances and doorways very narrow. It was a hazard for some of my family members who need walking assistant devices. (Wheelchairs, walkers, baby strollers wouldn't fit through these doorways leading to the back of the house where the kitchen is located.)
I brought in my general contractor and my structural engineer to look at the house before we started any work to see if what I had envisioned was possible. It's always best to consult a contractor when moving things like plumbing and relocating kitchens and bathrooms. You don't want to buy a house with a vision in mind and be told after that what you envisioned is not physically possible.


After we were green lit, I started to draw up plans myself with the help of free websites like IKEA. Here are the renderings we did on IKEA. This helped us map it out true to size.


There is the bird's eye view of the kitchen. We also used IKEA cabinet boxes so this website was very helpful when it came to ordering our base cabinets. (This is the framework of the kitchen and does not include the drawers or drawer and cabinet faces.)
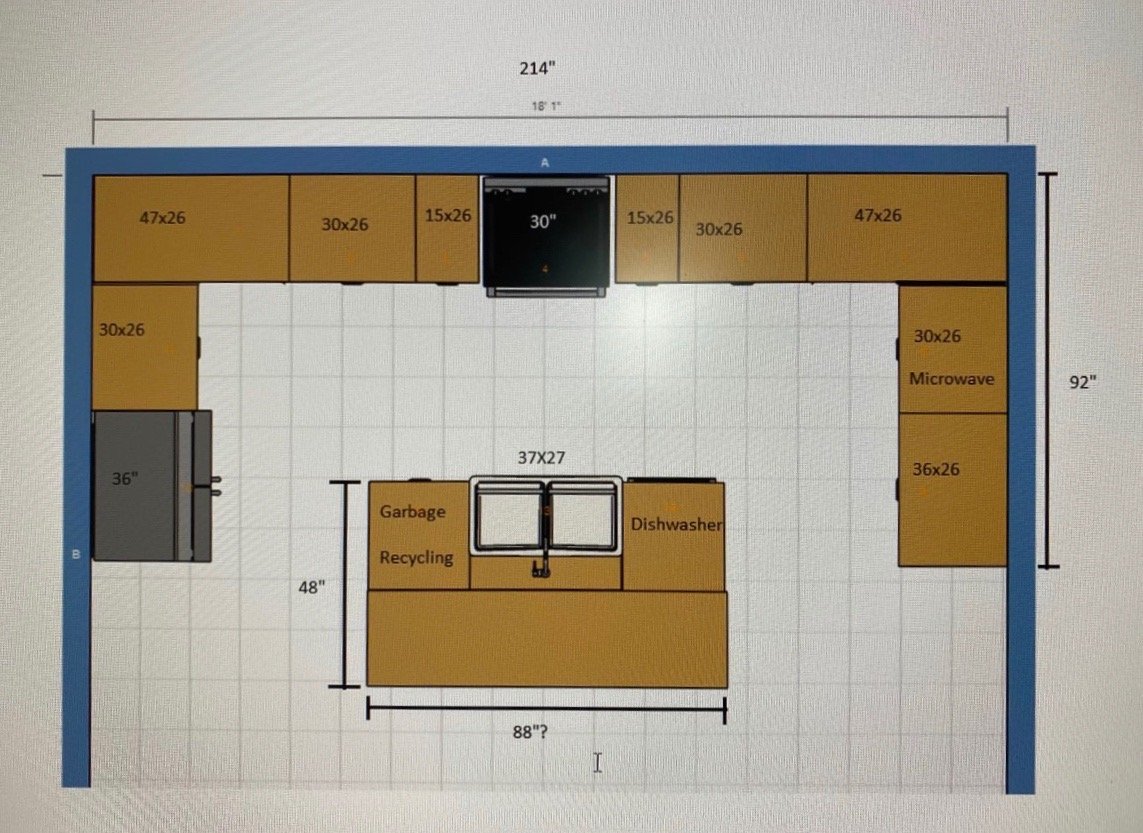
Here are the dimensions of our kitchen for those that are interested.
MOOD BOARD
Next I came up with a mood board. I'm not a professional interior designer and highly respect what they do. This is what I did as a novice. I used Pinterest and Instagram a lot to day dream. I pin and save everything and then observed what I liked. You can check out my Pinterest board for kitchens here.

When you look at everything you've saved, you'll begin to notice a pattern. Take note of the colours you like, the style, the tiles, the fixtures. For me, it was very obvious that I was drawn to black windows, bright white spaces, subway tiles, and beams.
Having a mood board will help you stay true to your vision when you have decision fatigue which is very real when doing renovations. There are a thousand different details and options in every decision it feels. I shared my mood board in detail here. You can find the links on that blog post in the photo below.

I used a program on the computer called Canva to make this mood board
And then it was time to source the products themselves. Here is what I came up with in my budget and was available to me at the time.

The two floor tiles you see in this mood board were used in the foyer and powder room on the same floor as the kitchen. I wanted to include them in the shot to make sure that everything I chose was cohesive as our house has an open concept layout.
KITCHEN CABINETS

We were building a kitchen from scratch but building a custom kitchen like the one in my inspiration photo would cost a lot of money. So after some research I found out I could achieve the look for less.
We ordered IKEA kitchen cabinet bases that K and his friend assembled. They cost a total of $1,300 delivered to our house.
I didn't choose any of the IKEA kitchen fronts that were available because I wanted a taupe-y finish (I knew this from all the inspirational photos I saved) and I wanted something a little more detailed than a basic shaker cabinet. (My previous two kitchens were white shaker cabinets and I wanted to do something a little different.)
In my research I found Nieu Cabinet Doors and knew a few friends who have also used them before and had great things to say. They are a company that creates custom cabinet fronts! So I was able to create a custom kitchen look for less!
We built our kitchen from scratch but if you were to order just cabinet fronts from them, you can give your kitchen a facelift at a fraction of the cost.
I went with their Angela Rose Slim Shaker Detail in a custom colour. You can order these doors pre-primed or raw and you can paint them yourselves or choose one of their beautiful colours on their website.
The cost of the cabinet and drawer fronts were around $6500 but we also opted to do custom drawers with them so it was priced higher.
I LOVE how it turned out and it really did give me that custom look for less that I was looking for. I could have done an entire IKEA kitchen but I really wanted this soft taupe colour that I seem to be drawn to (I kept pinning kitchens that were this colour over and over again!) The colour I finally settled on is called Natural Tan (SW7567) by Sherwin Williams.
To give you an idea of the comparison if we went with a basic IKEA kitchen with white shaker cabinets the cost of the kitchen would be $10,754.86. For this kitchen with IKEA bases, custom drawers (they're solid wood) and cabinet fronts it was a total of $12,158.29. So for an extra $1,403.43 I got to customize the cabinet fronts in the colour I wanted that wasn't available to me. Plus we upgraded to custom drawers with solid wood dovetail detailing. It's not chump change, but I think it was well worth it!
And PS this is a Canadian company so I didn't get charged with duties.

COUNTERS
When picking out counters, I knew I wanted to go with quartz again. My previous two kitchen remodels were also done in quartz and it suits the way we live. (We are big entertainers and we don't baby our kitchens.) We chose HanStone quartz for the quality, durability and for looks. It's called Calacatta Gold and it brought in the warmth of the cabinets and floors.

I believe the total cost of the counters was around $9,000. We were quoted at $100/sq feet by the fabricators which includes the fabrication and installation of the three slabs. Prices will vary depending on the fabricator so call around for the best price.

I love the gentle veining of these counters and they're super easy to upkeep. I don't have to worry about staining, water marks or scuff marks with these HanStone quartz counters. That's the beauty of them besides their obvious good looks. (I find a little baking soda paste to be the perfect cleaner for these counters when there's any bit of staining.)
BACKSPLASH/ GROUT
The backsplash we chose were from Centura Tile called Artisan in white. I lost the receipt to this order but I believe it was around $890. They were around $10/sq feet when we bought them. The grout we used is called Vapour Grey. It was a step up from the subway tiles in our last two houses and gave our kitchen more character and texture. I also love how there is a variation of colour! Makes it look more handmade and custom.

BEAMS
As for the beams in the ceiling, our contractor built these out of our floor boards to hide the wiring of our pot lights (there was none in this space before.) I love this architectural detail so much as it really highlights the peak in the roof!
The spotlights were $105/piece which includes the installation as well.
FLOORING
The flooring is a different issue altogether. I wrote about that saga here. The same white raw oak engineered hardwood floors run throughout the house so it's hard to estimate for just this one area. But we have had no issues in the past when we opted to use engineered hardwood as oppose to tiled floors in the kitchen.
WINDOWS/ DOORS
The windows we got are black gridded windows and I think they're made out of vinyl but K dealt with that part of the renovations. We did close up the patio doors in this space to make room for the layout of this kitchen. We ended up relocating the doors into the dining room next to the kitchen and chose black French Doors. It cost us $3,000 to close up that existing patio door. We hired Comfort Windows Doors to install all our windows and doors on the main floor. They were around $1,500 per window. So the total of three in our kitchen is $4,500.
We also used this company when replacing the doors but there are some minor issues we need to address with them so I'm not sure I 100% recommend this company yet. Love the team though. Will report back when those issues are fixed.

PAINT
I get asked often what paint colour we put on the walls. The truth is, it's just primer at this point. I have a hard time committing to a paint colour and know I'll be changing it in the future (when I get around to it lol!) So that's the answer- there is no actual paint colour I can give you because it's just primer haha!
APPLIANCES

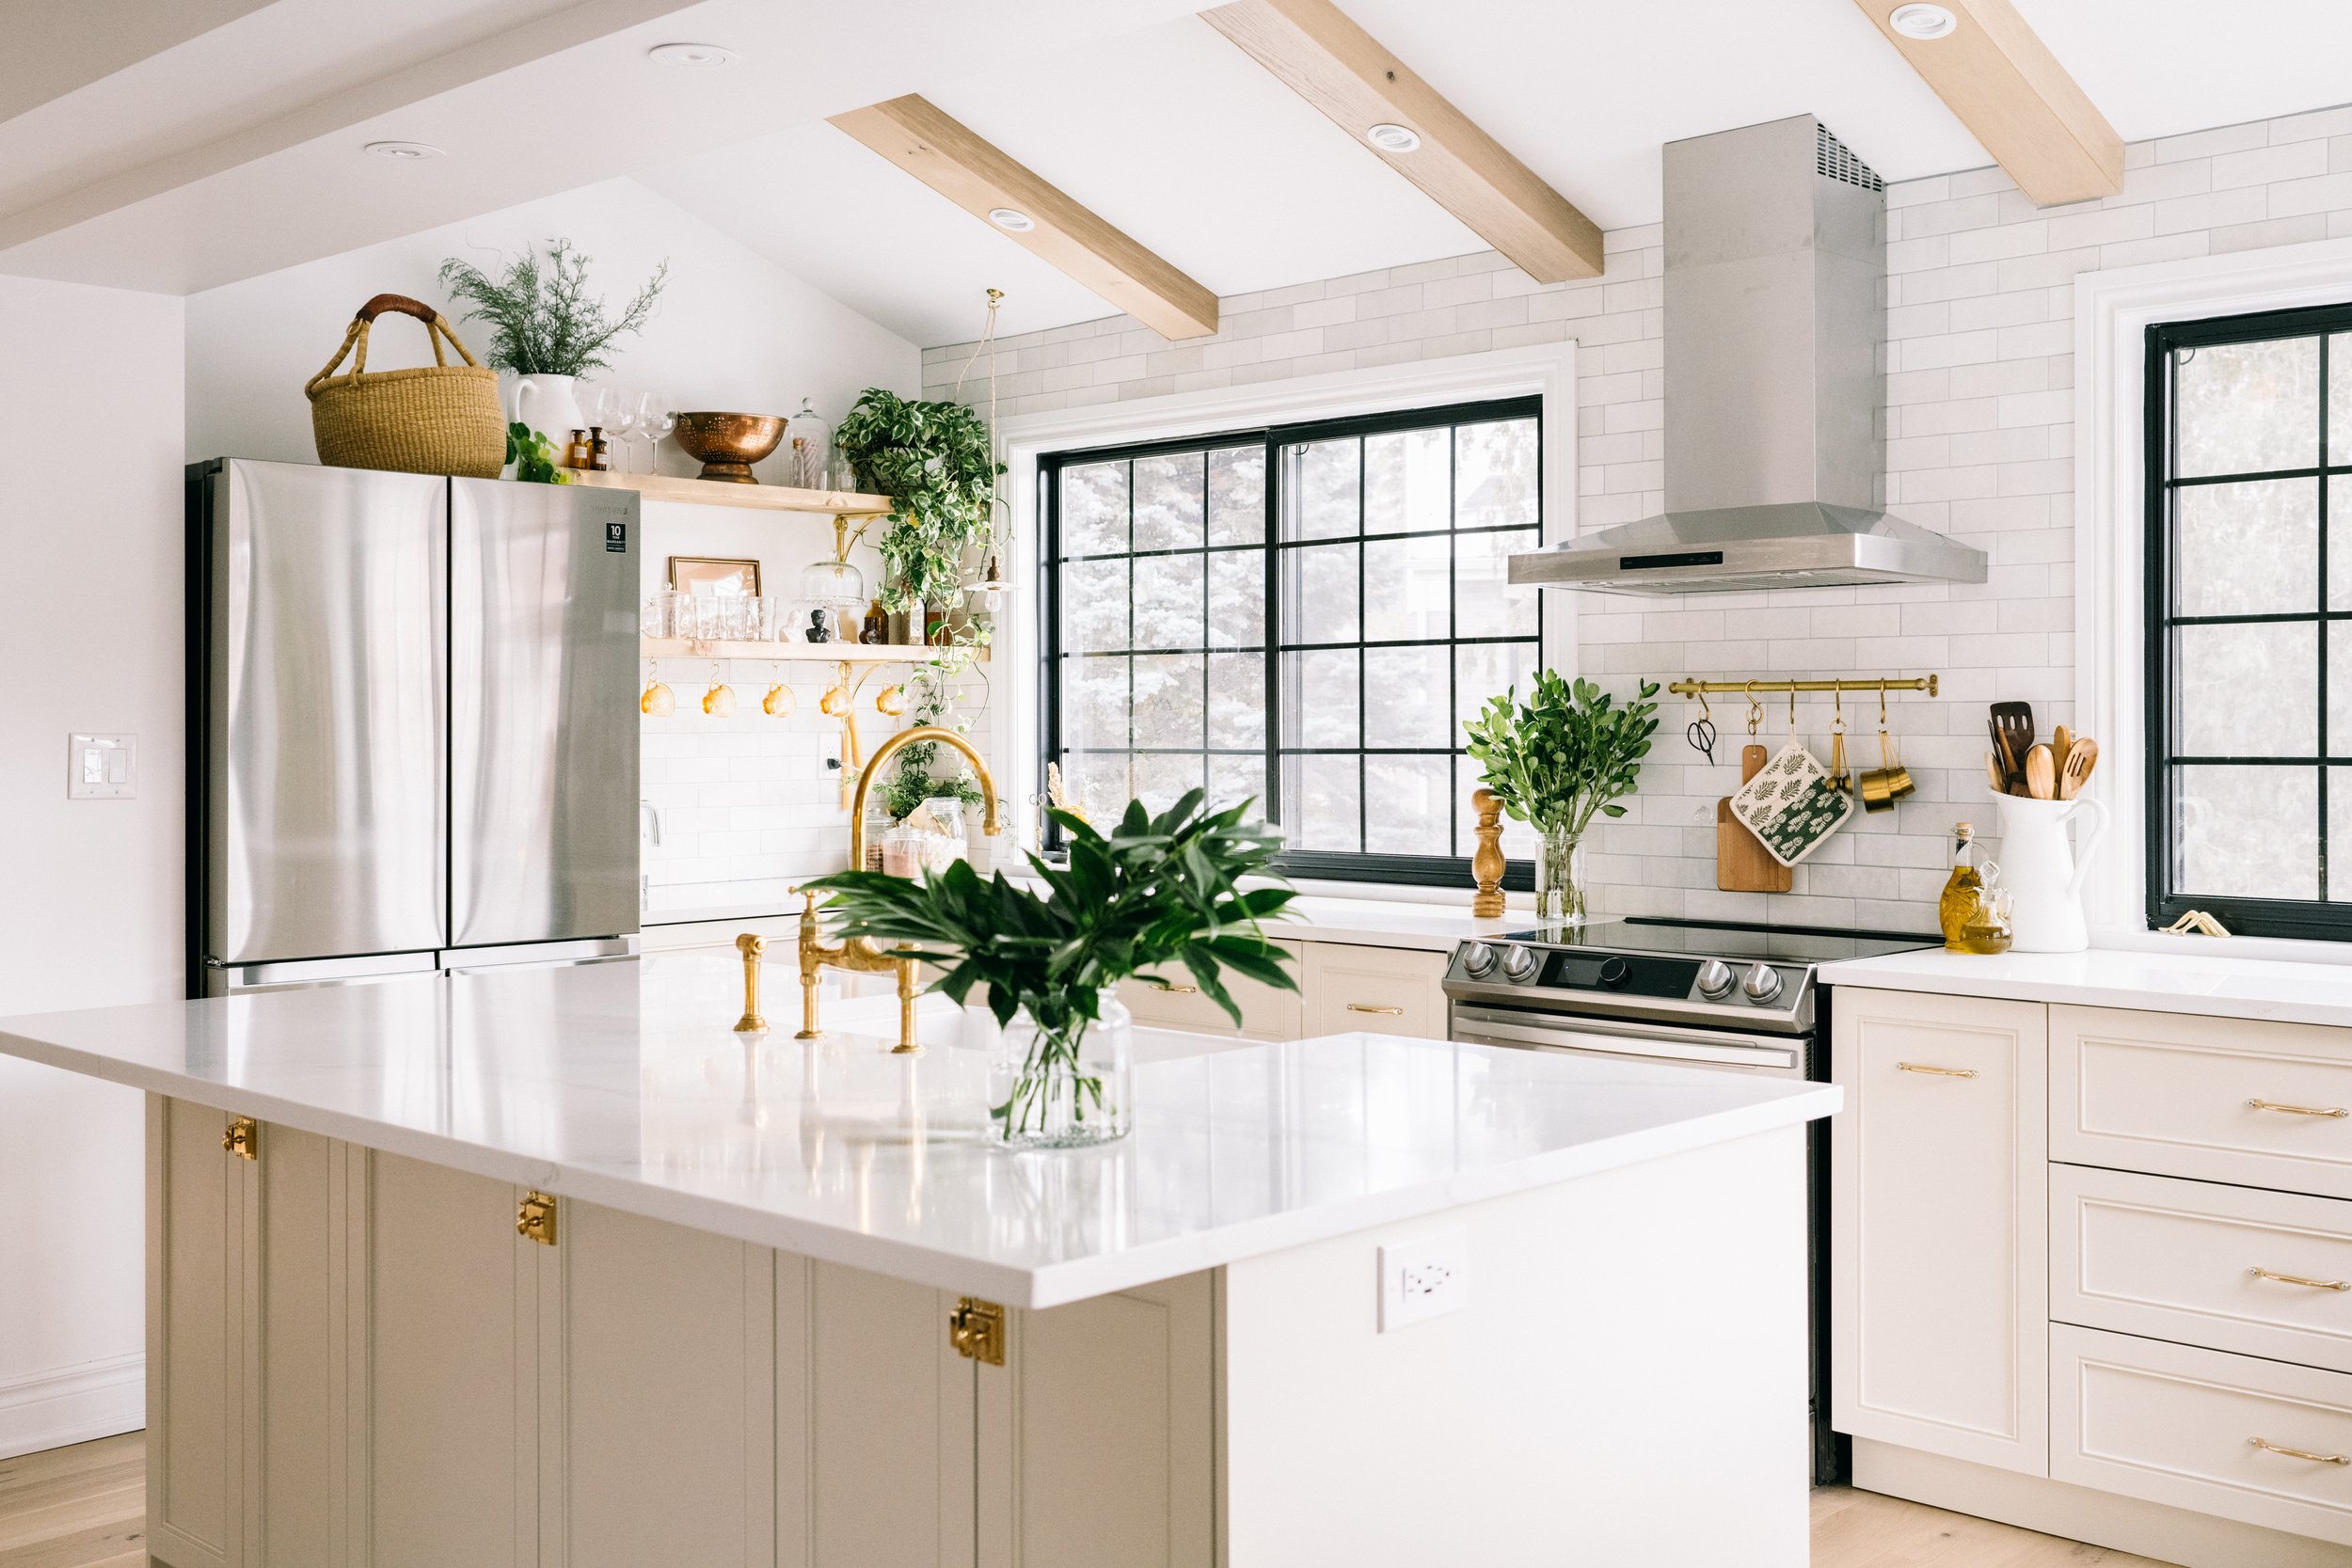
We spent around $10,100 for all our appliances which includes our Samsung fridge, oven, vent hood, dishwasher and microwave. We got a deal by ordering all our appliances at once (included our washing machine and dryer.) Here are the links to all the appliances in our kitchen. (PS I swear I'm not sponsored by Samsung LOL!)
OPEN SHELVES

These open shelves are a very affordable DIY! You can find my blog post on how I created these here. I included the colour of the stain and the links for the brass brackets in that blog post.
SINK
We splurged and got a really nice fireclay sink. It is by Shaws and it is their 33 inch shaker double bowl undercount sink in white. It was $1,295.00. We also chose white baskets (the drain cover) and they were a $235.00 for both.

HARDWARE
Ok so when I say we splurged on the sink I also mean I REALLY splurged on the faucet. This is from deVOL and it was $1,475 (USD?) for the Aged Brass Ionian Tap with rinser.
I love it so much. I also got the kitchen rail from deVOL as well. It's this one here and it's the 22" one that includes 5 brass hooks. It brings a bit of sparkle to the kitchen. But it did cost me $150. Some people buy jewelry and clothes. I buy hardware for my house. LOL.


Here are some of the nittier and grittier links like small appliances, and accessories. If it's not linked, it's because it was vintage and thrifted (I'm looking at you charming green spice cabinet in the corner.)
Smeg Kettle in Cream Canadian Link
Smeg Kettle in Cream American Link
Smeg Coffee Machine in cream American Link
Smeg Coffee Machine in Cream Canadian Link
Smeg Toaster in Cream Canadian Link
Smeg Toaster in Cream American Link
I'll write a review on SMEG appliances soon so stay tuned for that.
ACCESSORIES

Here are the links to some accessories that I get asked about frequently. I thought to include it in this blog post. I couldn't link everything because some were vintage pieces and some are simply discontinued.
COST BREAKDOWN:
And here is the moment of truth. The cost breakdown. I also noted down any products that were gifted due to the nature of my work.
I included some of the labour including demo, engineering work when it came to the load bearing wall but that was the extent I could break it down. I worked closely with my general contractor for the rest of the house so it's difficult to divide all the plumbing, electrical work and flooring for just the kitchen when it was priced for the entire house.
| Item | Cost |
|---|---|
| Demo | $2,200 |
| Remove load bearing wall | $15,000 |
| Closing up patio door | $3,000 |
| Windows | $4,500 |
| IKEA bases | $1,300 |
| Cabinet Fronts from Nieu Cabinet Doors (partially gifted, listing retail cost) | $6,311.79 |
| Cabinet drawers (partially gifted, listing retail cost) | $4,546.50 |
| Counters from HanStone (gifted, listing retail cost) | $9,000 (approximate cost) |
| Backsplash | $890 |
| Appliances | $10,100 |
| Sink | $1,530 |
| Faucet | $1,475 |
| Cabinet Hardware | $492 |
| DIY open shelves + hardware | $200 (approximate cost) |
| Potlights | $105 x 9= 945 |
| Total | $62,045.29 |
This entire process took us about seven months due to the pandemic and labour shortages. Keep in mind that we were working on the entire house as well. These prices are in Canadian dollar at a time when lumber and pretty much everything else was at it's peak in Toronto, Canada (in June 2021- December 2021.) I wanted to note that here in case anyone were to stumble on this blog post in the future.
I hope you found this blog post helpful for sources and that the budget breakdown gave you an idea of what a project like this might entail for you. (Especially if you were moving an entire kitchen to a different location in the house.)
I tried to give as much information as possible, if there are gaps in this project breakdown it's because it was too difficult separate the cost of a quote on a job as a lot of projects and trades were hired to do work for the entire house. (Like painting, drywalling, laying flooring etc.)
Anyway, if you've read to the bottom of this blog post, you are a real one! I appreciate you!
Thanks for reading!
Love,